1. Intro
SpikeOut is the best 3D beat ’em up out there. It is also one of the more difficult, obtuse and underdocumented beat ’em ups out there. Unless you have some experience with beat ’em ups or arcade games in general, you will likely drown and die repeatedly without knowing why if you try to play the game without creditfeeding (repeatedly continuing after a game over).
Yet it is also one of those arcade games that is uniquely miserable to creditfeed through, at least when playing solo. Not only will you get crowded and die often for reasons you won’t quite understand, but all fights look the same and the game is terribly long for arcade standards. Compared to other beat ’em ups, there is not much in the way of spectacle or variety to keep you hooked while you’re still learning the game, and SpikeOut doesn’t have any major hooks gameplay-wise other than “it’s a beat ’em up, but 3D”. Even just watching gameplay of a full SpikeOut run will make the game come off as repetitive when you’re not yet familiar with how it works.
The thing about SpikeOut is that it’s driven top-to-bottom by invisible nuances – ranging from impressive chess-like dynamics to absurd jank – that you would never discover from only watching it on video. Every action and situation has a hundred edge cases that you need to keep in mind at all times, and few things in SpikeOut will play out the exact same way as in a previous run. Memorizing routes and enemy spawn positions can only get you so far in SpikeOut–being able to read a situation and adapt accordingly will prove more important. Although the game is terribly long, it will keep you on your toes from start to finish.
That is why I don’t recommend playing SpikeOut through unlimited creditfeeding (unless you’re playing co-op). Its nuances–and basically the sole lasting appeal of the gameplay–only come to the fore when you’re trying to consistently beat a section without dying too much. Mastering its nuances is really all that SpikeOut has to offer outside co-op. For casual solo play, SpikeOut might only be good for about 4-8 hours until you get bored of it. To get anything more out of SpikeOut, you need to be a bit of a sicko. If you do, you will find that there’s almost nothing like it.
To share the love and make the game more comprehensible, I’ve written this guide to help anyone who wishes to learn how to play SpikeOut and understand it better. Given the amount of depth to cover, I’ve split it in two parts: this first part that covers the basics, and the second part that covers the more advanced concepts and specific strategies.
Hopefully this guide will be of some use to you.
1.1. Setup
At the time of writing, there is no official port of SpikeOut on modern systems, other than as a mini-game through Like a Dragon: Infinite Wealth. However, I recommend you play it on PC using the Sega Model 3 Supermodel emulator, as it provides the most emulation options and is the best option for practicing individual sections (using savestates).
I’ve written a full article elsewhere on all the ways you can set up SpikeOut, and the pros and cons involved in them here.
tl;dr I recommend using the PowerShell installer script I made, as it sets up sane defaults and integrates it with your Steam Library so it can use Steam Input and make it work across all controllers or fightsticks.
1.2. Digital Battle Online vs. Final Edition vs. Battle Street
There are actually three versions of SpikeOut: the original Digital Battle Online version, its updated Final Edition version, and the pseudo-remake/sequel Battle Street released on the original Xbox five years later.
Final Edition is the updated version of SpikeOut that came out 4 months after Digital Battle Online. It features a bunch of extra stuff, bug fixes and balance changes, and is the more complete version of SpikeOut. Personally I prefer playing Final Edition and think it’s the most fun of the three.
Battle Street plays near-identically to Final Edition, down to having the same stages and enemy spawns. There are only some minor (albeit questionable) gameplay changes under the hood and more playable characters. It also comes with a practice room, where you can freely practice combos on training dummies. It’s the most feature-complete version, but the visuals are also a massive downgrade.
However, I recommend that new players and especially those inexperienced with beat ’em ups start with Digital Battle Online.
The reason why is that Final Edition also makes some balance changes that makes the game harder overall (which were also carried over to Battle Street), especially where the boss fights are concerned. Here’s a few examples:
- All instances of super armor for boss enemies are now replaced with total invincibility. Before you could interrupt a lot of special boss attacks, but in Final Edition it’s completely impossible to interrupt them.
- Most boss enemies have new invincible follow-up attacks that they can do after doing an invincible attack.
- Certain boss enemies can now do an invincible mid-air recovery to randomly escape from being juggled or jump thrown.
- What boss enemies will do after recovering from a knockdown is now completely random, instead of being easily loopable from doing the same thing on wake-up each time.
- The new Shipyard route might be shorter than the Astro Mall route, but it’s also significantly more difficult.
Now, Final Edition does make a few changes in the player’s favor:
- The total HP for all boss enemies has been reduced on all difficulty settings.
- Special throw attacks have been significantly buffed and are actually worth doing now.
- You no longer need to C4 an enemy from the front specifically to launch them into a juggleable state, and can now juggle them after C4’ing them from any direction.
- The final boss has been toned down somewhat (he drops his sword earlier and can’t pick it back up).
- The game starts on a new intro stage (“Spiker’s Camp”) that is deliberately easier and gives new players a smoother difficulty curve.
Despite this, Final Edition is in general more difficult, which is why I recommend starting off with DBO. You’re also bound to get sick of replaying through Spiker’s Camp once you got the hang of it.
1.3. Difficulty settings
DBO and FE let you select between 5 difficulty settings (Easiest, Easy, Normal, Hard, and Hardest), and are by default set to Normal. For Battle Street, it’s just Easy, Normal and Hard.
The difficulty settings affect the following:
- Maximum player HP (the higher the difficulty, the lower it is).
- Enemy aggression (the higher the difficulty, the faster enemies will start attacking when you’re in range, and the faster they’ll start chasing you if you’re out of range.)
- On Normal and above, most boss enemies will be briefly invincible after recovering from a knockdown.
The difficulty settings can be changed by entering the SERVICE menu. If you used my installer setup, this can be done by pressing INSERT COIN+START on your controller, or pressing 7 on your keyboard. For other Supermodel setups, you have to press the key bound to TEST A or TEST B in the Supermodel configuration.
I recommend that you start at Normal difficulty, because the higher difficulties will make mincemeat out of you if you haven’t grasped the fundamentals yet. Feel free to set the difficulty to Easy or Easiest when you want a more chill experience or if Normal is proving too much for you.
If you’re playing SpikeOut via Like a Dragon: Infinite Wealth, then you won’t have the option to change the difficulty settings, and you won’t be able to play on Hard or Hardest difficulty at all. You are forced to play on virtual cabs that are set to either Normal or Easy.
1.4. Button layout
As SpikeOut relies on a lot of multi-button inputs, you should make sure that you have some good keybinds set up so your fingers can easily reach all buttons.
If you’re playing on a gamepad, I recommend the following layout, which is similar to the default controller layout used in Battle Street. If you’re using my PowerShell installer, the shortcuts are also included:

If you’re playing on an arcade stick, I recommend you use a layout similar to the one used on the actual cabinets:

2. Basic game overview
2.1. Move list
For this guide, we will be using the button notations of the arcade version. These actions are available to all characters, and the move lists for all characters is nearly identical.
Basic actions:
- Joystick / lever: Walking movement.
- Double-tapping the lever and then holding it: Running movement.
- SHIFT: Hold down to lock on to enemies and/or enable strafing movement.
- BEAT: Press to execute Beat attacks. Tap up to six times to execute a Beat string.
- CHARGE: Press or hold to charge and execute different charge attacks.
- Tap/Mash CHARGE: Kick attack (for Linda it’s a jab attack). Tap up to three times to execute a C-string (CCC).
- Hold CHARGE up to level 2: Launcher attack. Launches or juggles any enemy or boss on hit.
- Hold CHARGE up to level 3: Stun blow. Dizzies most enemies on hit.
- Hold CHARGE up to level 4: Bowling strike. Sends hit enemies flying forwards, knocking over other enemies in their path. Has light super armor.
- JUMP: Tap to jump. Hold to jump higher. Jumping arc inherits momentum from movement.
- START: Tap to toggle mini-map zoom level.
Multi-button actions:
- BEAT+CHARGE: Sweep attack.
- Press BEAT after it for a sweep follow-up attack.
- JUMP+BEAT: Homing attack. Has light super armor.
- DOWN+BEAT+CHARGE: Picks up a weapon near you.
- Tap CHARGE+JUMP: Jumping attack. Varies heavily per character.
- Hold CHARGE+JUMP: Rising split-kicks.
- Press CHARGE again in the air to perform the second split kick.
- While holding SHIFT, tap the lever in the opposite direction your character is facing + CHARGE: Backsweep.
- While running…
- … BEAT+CHARGE: Running jumpkick. Varies heavily per character.
- … CHARGE+JUMP: Varies heavily per character.
- (Consumes 1 Special Item) BEAT+CHARGE+JUMP: Special attack.
Grab/throw actions:
- When grabbed by an enemy: wiggle lever left/right repeatedly or perform a Special Attack to escape.
- Walk into an enemy (that isn’t attacking) without shifting: Grab enemy.
- While grabbing an enemy from the front…
- … and holding a movement direction + BEAT: Forward throws enemy towards movement direction. Varies per character.
- … and not holding any movement direction + BEAT: Pummel attack. Can be repeated up to two times.
- Repeat for a third time to execute a pummel finisher. Varies per character.
- … JUMP: Shift from a frontal grab to a rear grab.
- (Consumes 1 Special Item) … BEAT+CHARGE+JUMP: Special throws enemy towards movement direction (if one was held). Varies per character.
- While grabbing an enemy from the side…
- … BEAT: Side throws enemy towards movement direction. Varies per character.
- … JUMP: Transition from a side grab to a rear grab.
- While grabbing an enemy from the rear…
- … BEAT: Performs a back throw on the enemy towards the input direction. Varies per character.
- … JUMP: Jump while holding the enemy.
- pressing BEAT after reaching the apex of your jump: Jump throws enemy towards movement direction (if any was held).
Actions while having weapon equipped:
- BEAT: Attack using weapon.
- Tap CHARGE: Secondary attack using weapon.
- BEAT+CHARGE: Throw weapon. Can be done mid-air.
- Use while holding SHIFT to throw weapon towards a locked-on enemy.
- If you tap the opposite direction your character is facing while doing the throw input, your character while throw the weapon while doing a backwards somersault.
- (Other multi-button and charge actions are still available while holding an one-handed weapon, but not a two-handed weapon)
Special actions:
- (Final Edition only) Press START while holding SHIFT: View game statistics for all players in the session.
- Press once to see Special Item and score count for all players. Press twice to see K.O. counts for all players.
- Rotate lever 270 degrees clockwise + BEAT: Perform a “thank you” emote.
- Rotate lever 270 degrees counter-clockwise + BEAT: Perform a “sorry” emote.
- (Final Edition only, only while health bar is low and flashing) Rotate lever 270 degrees counter-clockwise + BEAT + CHARGE: Perform a “help” emote.
- (Consumes 1 Special Item) Rotate lever 270 degrees clockwise + BEAT + CHARGE + JUMP: Perform a “taunt” emote. You are invincible while taunting, and enemies trying to hit you will be knocked back for 1HP damage.
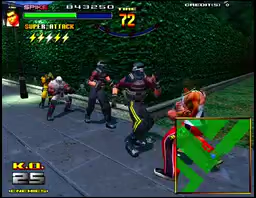
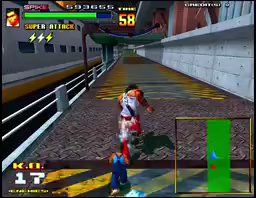
2.2. Game objectives

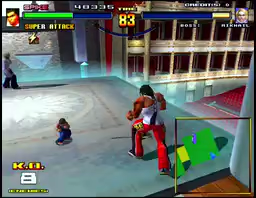
Your main objectives are simple: K.O. all enemies in a timely fashion, and don’t die. Once you’ve K.O.’d all enemies, you have 30 seconds finish up your business and break the gate to the next area, which will be helpfully marked with one or more big Crazy Taxi arrows on your screen.
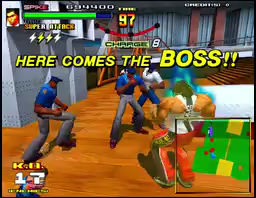
Frequently an area will end with a boss fight–in these cases you only need to K.O. all boss enemies to be able to move on to the next area. Once all boss enemies have been K.O.’d, all their remaining minions will run away from you in fear, leaving you again with 30 seconds finish up to break the gate.
2.3. Health and special items

Your health (HP) can be refilled in two ways: picking up health items, or clearing an area.
Clearing an area also restores a large portion of your HP, depending on how many enemies and boss enemies you’ve K.O.’d. In co-op the health bonuses will be divided between how many enemies each player K.O.’d, but in solo play you’ll get all of it, which usually nets you between 50% to 80% of your total HP. This is why it can be worth it to mop up fleeing enemies after you’ve K.O.’d all boss enemies.
Health items come in small, large, and red variants, healing you for about 10%, 20% and 50% of your total HP respectively. Sometimes health items will be placed in hidden or hard-to-reach places in the stages, but usually they will be dropped by enemies with specific names.
Special items are used for your Special Attacks. You start with three and can carry up to five. Like health items, most of them are dropped by specific enemies, but you also get 1 special item refill after clearing an area. If you clear a stage, you get 3 special item refills instead.
2.4. The timer
Compared to most beat ’em ups, the timer in SpikeOut is relatively strict, especially when playing solo. If you keep lollygagging around too much you will certainly game over via time out. However, you’ll be fine for most of the time as long as you realize that the timer will refill as long as you keep K.O.‘ing enemies.
The way the timer works is like this:
- The timer only goes up to 99 seconds.
- You start most areas with 99 seconds on the clock, but some areas might have you start with 75 seconds, or even less.
- The timer is refilled by 55 seconds for every 8 enemies K.O.’d.
- When a boss fight starts, the timer is refilled by 45 seconds.
- K.O.‘ing a boss enemy refills 30 seconds.
- For boss fights with a single boss enemy only, getting the boss down to 50% HP refills the timer by 30 seconds. This does not apply for duo or trio boss fights.
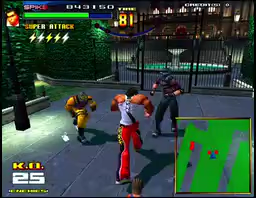
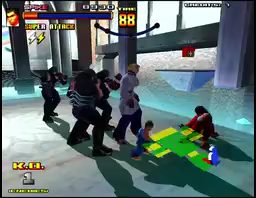
2.5. The mini-map

SpikeOut shows you a mini-map at all times to display what’s happening off-screen. It shows you all nearby enemies, partners, and pick-up items. Keep an eye on your mini-map to avoid any off-screen surprises, or when the camera is being uncooperative.
The mini-map can has two zoom levels that can be toggled by pressing the START button. It can be zoomed out to give you an overview of the entire area, or zoomed in to the are around you. You want to keep it zoomed in by default, and zoom it out when you need to keep track of far-away enemies or partners.
2.6. Stage routes
When it’s time to break a gate, sometimes there will be multiple gates to break. Depending on which gate you break, you will progress to different branches of the stage.
Sometimes alternate gates will be highlighted with another arrow, but often they will be unmarked and considered secret.
Going over each stage branch and what challenges they hold is a bit too much information for a beginner, so for now just hold the following key points in mind:
- Each run has you go through these stages in this order: SPIKER’S CAMP -> DIESEL TOWN -> SHIPYARD / ASTRO MALL -> IMPERIAL OPERA
- SHIPYARD and SPIKER’S CAMP are only present in Final Edition.
- SHIPYARD is a shorter stage than Astro Mall, but is generally harder.
- SHIPYARD and ASTRO MALL have an A and B version, where you’ll progress through different areas in a different order depending on the version. Which one you get depends on the route you took in DIESEL TOWN.
- IMPERIAL OPERA has a short and a long route, where the long route is mostly the same as the short route but with a few extra areas. Only take the long route if you want extra challenge.
For beginners in Digital Battle Online, I recommend this route:
- In DIESEL TOWN: BRIDGE -> STREETS -> … -> FACTORY -> ROOFTOPS
- In ASTRO MALL A: … -> STORE ENTRANCE -> RECORD STORE
For beginners in Final Edition, I recommend this route:
- In DIESEL TOWN: … -> BRIDGE -> SEWERS -> FACTORY -> WAREHOUSE -> STREETS -> BRIDGE (again) -> ASTRO MALL D
- In ASTRO MALL D: … -> STORE ENTRANCE -> GARAGE
2.7. Scoring
SpikeOut has a scoring system, but if you’re starting out with the game I would just ignore it. You don’t get any rewards like extra lives or items for scoring well, it has no influence on playing for survival. The bonus games in Final Edition are only good for extra score points too.
I don’t intend to go much into detail about it in this part, but the gist of it is to juggle as many enemies as possible for as long as possible while hitting them with as many C4s as possible. I will cover it in more detail in the next part.
3. Movement
3.1. Basic movement
To walk around, move the lever.
To jump, press the JUMP button. The longer you hold down the JUMP button, the higher you’ll jump. Jump while walking or running to jump towards that direction. You won’t be jumping around a lot in SpikeOut, but it has its use cases.
To run around, double-tap and then hold the lever in the desired direction. Running is your fastest movement option in SpikeOut. You are always on a timer in SpikeOut, so make sure to run where possible. However, you can’t turn fast when running.
To do a 180-degree quick-turn, tap the lever in the opposite direction your character is facing when not holding the SHIFT button. So if your character is facing towards the right side of the screen, tap left. This lets you turn around much faster than while walking or running, but you cannot move while quick-turning. Use this to quickly turn towards enemies behind you.
3.2. Shifting
You’ll notice that your character does not instantly turn towards where you’re moving as you would in a 2D beat ’em up. This is where the SHIFT button comes in play.
When moving while holding down SHIFT, your character’s facing direction will be locked towards the nearest enemy your character is facing, and your character will move around by circlestrafing around that enemy. From here on out this will be referred as “shifting”.
Making use of shifting is essential to be able to play SpikeOut at all. Shifting makes it easier to do micro-movements, and shifting is faster than walking–but still slower than running.
Shifting works similarly to lock-on buttons in other 3D action games such as Devil May Cry or Ocarina of Time. However, SpikeOut differs from most lock-on systems in that it does not automatically turn your character towards the nearest enemy upon pressing the SHIFT button. It will only lock you on to the closest enemy currently in front of your character. This means that if you want to lock on to an enemy behind you, you must first release the SHIFT button and manually turn towards that enemy, and only hold the SHIFT button once you’re facing that enemy.
If you press the SHIFT button when your character is facing no enemies at all, your character’s orientation will be locked in the direction they’re currently looking in, but you’ll still be able to move around by strafing. This is useful to know when dealing with attacks from behind, since shifting forwards to get away from a rear attack is faster than trying to turn around.
Basic character control in SpikeOut therefore involves a combination of shifted and un-shifted movement: you want to shift to accurately and quickly move around a group of enemies, and then use unshifted movement–or quick turns–to turn towards the next enemy that you want to lock on to.
Shifting is also important to quickly end a run. If you end a run normally, your character will be stuck in a run recovery animation during which you cannot move, but you can instantly cancel this animation by attacking or shifting.
4. Offense
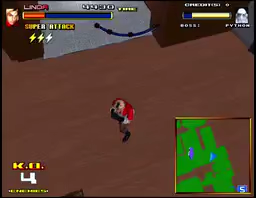
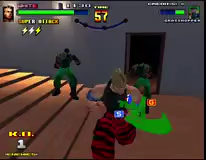
4.1. Beat attacks
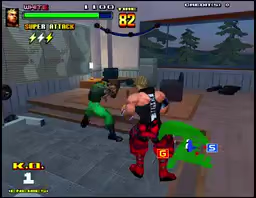
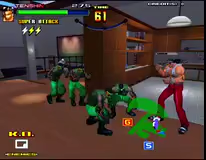
Tenshin’s standard BBBBBB string.
Your most basic attack is the Beat attack, which is performed with the BEAT button.
Like in most beat ’em ups, you can repeatedly tap this button to do a string of quick of Beat attacks that ends with a powerful Beat finisher, which comes out in the sixth hit of the string. A single string will usually knock out most small fry and knock down/launch stronger enemies. What the Beat finisher actually does varies per character.
You can prematurely end a Beat string by not pressing the BEAT button again for half a second after one of the first three hits. But from the fourth hit onwards you’ll be locked into the Beat string, and trying to end it from that point will leave you in a long recovery state that enemies can easily punish.
You cannot manually move or turn your character while performing any kind of attack string. It’s not possible to target another enemy mid-string unless you end your string first. However, the orientation and angle of your character can change mid-string, as a result of SpikeOut having a bit of soft lock-on where your character will automatically turn towards an enemy if you were attacking towards their direction.
You can also perform a Charge string (AKA a C-string) by repeatedly tapping the CHARGE button, up to three times. However, outside of a few edge cases it’s never worth it to do a C-string by itself.
The real benefit of C-strings is that you can tack them on after the 3rd hit of your Beat string; the input looks like BBBCCC. A BBBCCC string deals more damage than a BBBBBB string, but the downside is that it doesn’t launch enemies as far, and is a bit harder to execute. You can’t mash out the input and have to do it in a fast rhythm. However, the extra damage is usually worth it when it comes to clearing out fodder enemies. Generally you want to do a BBBCCC instead of a BBBBBB.
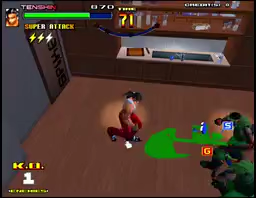
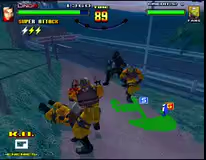
4.2. Beat loops
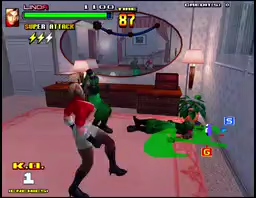
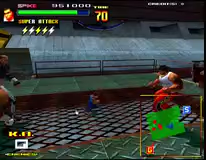
A Beat loop using repeated BBBCC’s.
But then you don’t want to be always doing full Beat strings or BBBCCC strings either, especially once you start facing enemies with more HP. Mashing out a full string each time leaves you very vulnerable to being punished by surrounding enemies, and it’s not even the fastest method of K.O.‘ing an enemy. Knocking down an enemy with a Beat finisher and having to wait for them to get back up also takes up a lot of time. Is there a faster way of K.O.‘ing enemies?
Enter Beat loops. Instead of knocking down an enemy with a full Beat string, you can instead keep them standing and stunlocked by repeatedly hitting them with the first two/three hits of the Beat string. If you ever used jab loops in Streets of Rage 2, it’s the same principle.
Beat loops are not effective at all against boss enemies. See the boss enemy section for more info.
In terms of inputs, it looks like you’re inputting BB-BB-BB-BB-and so on, or BBB-BBB-BBB-BBB-and so on. You have to repeat BB or BBB in a steady rhythm to keep an enemy properly stunlocked, as enemies will counterattack immediately if you drop the rhythm.
The loop that deals the most damage over time is to repeat BBBCC-BBBCC-BBBCC-etc., which is the one that you want to do most of the time. But it’s also the hardest one to perform, and you’re locked in for longer; you can more quickly pivot to doing something else between BBs than BBBCCs. Repeating BB or BBB is easier, but they don’t deal damage as fast.
You can also mix BBs, BBBs and BBBCCs together (f.e. BBBCC-BBBCC-BBB-BB-BB-BB). One situation where you might want to do this is when an enemy is approaching you while you’re looping an enemy with BBBCCs; you can shift to looping said enemy with BBs to squeeze in extra hits before you have to pivot to deal with the other enemy.
4.3. Grabs and throws
Throws are essential to surviving and controlling crowds in SpikeOut. They let you knock down multiple enemies at once, and you are completely invincible during a throw.

Instead of trying to do full strings or juggles or loops near multiple enemies, it’s safer and more effective to knock multiple enemies down using a throw, and then safely hit them for free as they wake up.
Just because you’re invincible during a throw doesn’t mean that nearby enemies can’t hit you right after your throw invincibility ends. Always try to position yourself and aim your throws so that an enemy won’t be within jabbing range of you after you do a throw.
4.3.1. How to grab
To grab an enemy, walk into them while not holding down the SHIFT button. Walking into an enemy while shifting merely pushes them around. While grabbing an enemy, you can then press BEAT to throw them into the direction you’re holding your lever towards.
Keep in mind that, like in Virtua Fighter, you cannot grab enemies that are in an attacking state, even if they literally just started attacking. This means that to ensure consistent grabbing you must either:
- grab enemies after they whiffed an attack.
- grab them while they’re dizzied from a C3. See the Charge System section.
- first interrupt them with a BB and then grab them while the enemy is still stunned. This is what’s known as a “strike grab”. Only Tenshin can’t do this. See the strike grab section.
Regular enemies cannot escape from a grab and will remain grabbed forever. Boss enemies, on the other hand, will quickly escape from your grab if you don’t quickly follow up with a throw.
4.3.2. Throw types
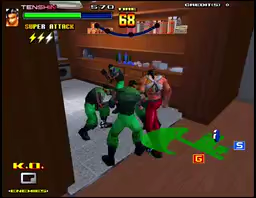
You perform different throws depending on whether you grabbed an enemy from the front, rear, or sides. Each character has different frontal/side/rear throws, some better or worse than others in terms of range or function. As a rule of thumb, jump throws are your most damaging regular throw, followed by rear throws, then side throws, and then frontal throws.
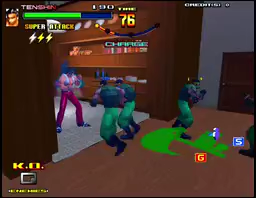
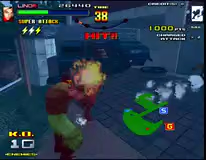
A jump throw from a frontal grab.
Jump throws are particularly useful because they’re the only regular throw that can knock down boss enemies. The way to do them is to grab an enemy from the rear, press the JUMP button to jump with the grabbed enemy, and at the apex of your jump press BEAT to jump throw the enemy in the desired direction. The timing for this is a bit finnicky, and you just have to get used to it.
You can only do jump throws from rear grabs, but thankfully it is possible while grabbing an enemy from the front or rear to shift to a rear grab by pressing CHARGE.
In Digital Battle Online you are completely invincible while shifting to a rear grab, which makes it easy to consistently set up jump throws from any grab. In Final Edition you are not invincible at all during the start-up of shifting to a rear grab, and enemies can hit you out of it. Whether it’s safe to do so in FE depends entirely on the situation.
4.3.3. Pummel attacks
With frontal grabs you can also perform pummel attacks, done by pressing the BEAT button while not holding any movement input. You can pummel an enemy up to three times, and, unlike most other beat ’em ups, you are completely invincible while doing pummel attacks.
On the third pummel you perform a pummel finisher, which on most characters sends the enemy flying forwards as if you threw them, but the downside with pummel finishers is that you cannot aim where the enemy gets launched. You’re locked into launching them towards the direction from where you grabbed the enemy.
So, doing only the first two pummel attacks is useful as a way of sneaking in extra damage for a frontal grab combo. You can pummel an enemy twice for extra damage, and then perform a frontal throw or shift into doing a rear/jump throw.
The reason you don’t always want to do this is that, while you are invincible while doing pummel attacks, there is actually a slight gap in your invincibility between doing a second pummel hit and a regular throw/rear shift that enemies can exploit. On the other hand, there is no such invincibility gap between the second pummel and the pummel finisher.
If an enemy looks like they’re about to attack you while you’re pummeling, it might be safer to move into a pummel finisher to remain invincible, rather than risk opening yourself up by doing a regular throw.
4.3.4. Strike grabs
Because attacking enemies cannot be grabbed, it seems difficult at first to be able to consistently grab enemies without having to wait for them to whiff an attack. As it turns out, there is a way to aggressively go in for consistent grabs using the “strike grab” technique. If you’ve played any Capcom arcade beat ’em up, the idea is similar.
The idea is that you first strike an enemy with some quick jabs, and then move in to grab them while they’re still in a hitstun state. For enemies that missed an attack on you, you can simply punish them by grabbing them as they recover, but for enemies in a neutral state you should aim to do strike grabs instead.
For Spike and White, strike grabs are performed by moving in after hitting an enemy with a quick BB, as this is the only string that they can recover from the fastest. For Linda it’s a bit different, who has to use a quick CC or BBBCC instead of a BB.
Tenshin, on the other hand, cannot perform “true” strike grabs at all. All his possible Beat attack strings leave him in recovery for too long to be able to consistently move into an enemy before the enemy can respond. He is more reliant on C3s and whiffs to grabs. He can still strike grab enemies using BB’s, but it’s not near-guaranteed like it is with other characters.
4.4. The Charge System
The most unique part of SpikeOut’s combat is its charge attack system. Depending on how long you hold down the CHARGE button, you can perform different attacks, each of which have their own uses. The most fun part about it is that you begin charging while doing other actions, giving you a lot of flexibility in when you can sneak in a charge attack.
There are four charge levels, visualized by the charge gauge at the top of the screen. Holding the CHARGE button fills up this gauge, and what charge attack you’ll perform depends on what portion of the gauge the charge gauge was at when you released the button.
4.4.1. Charge attacks
C1 (Charge Level 1):
Done by simply tapping the CHARGE button. Can be tapped repeatedly to do a CCC string. For most characters this is a kick attack string (except for Linda, who will instead perform jabs).
These aren’t that useful on their own; they are slow to come out, as they only come out on-release of the CHARGE button instead of on-press. Their main use is as alternate Beat string enders, such as BBBCCC strings or BBBCC loops to clear out fodder.
C2 (Charge Level 2):
A launcher attack that will launch any hit enemies into the air, and is primarily used to start or continue juggle combos.
This will launch every single boss and enemy type in the game, guaranteed (unless they’re invincible, of course). However, C2s have very poor range and are very easily punished by other nearby enemies, and so shouldn’t be used against enemies that are densely packed together.
C3 (Charge Level 3):
A gut blow that deals little damage, but is immensely useful because it’s your main method of putting enemies in a dizzy state.
Dizzied enemies will have stars floating around their head and be completely unable to do anything for a random duration between 4 or 12 seconds. This allows you to do whatever you want to them, or focus on other enemies first. Making good use of C3 attacks to dizzy enemies is essential to controlling crowds in SpikeOut.
However, if an dizzied enemy is hit by anything (including another C3!), no matter how minor, they will wake up instantly and be able to immediately retaliate. Be careful with your attacks and throws around a dizzied enemy.
C3s will not dizzy airborne enemies. It will just juggle them instead.
C4 (Charge Level 4):
Each character’s strongest attack. It is a bowling strike that sends enemies flying forwards, who will in turn knock over all enemies in their path like bowling pins. This is one of your most essential moves, as it can knock down and damage entire crowds in a straight line.
It also has a light super armor property, meaning that it won’t get interrupted by light enemy attacks such as jabs, although you’ll still take full damage.
In Digital Battle Online, you need to C4 an enemy from the front specifically to be able to juggle them afterwards. There you can’t continue juggling an enemy if you C4 them from the rear or side, but this has been changed in Final Edition to be doable from any direction.
Despite its massive usefulness, there are still a lot of conditions tied to using it effectively: enemies can simply back away on reaction from your C4’s (see the enemy dodging section); the space covered by launched enemies is deceptively narrow and will constantly miss enemies that aren’t perfectly lined up behind them; it has a long charge time and a long wind-up for the attack itself that makes it prone to getting interrupted by heavier enemy attacks.
4.4.2. The limits of charging
What makes charging interesting is that you can begin charging while doing other actions. This means you can start charging while in the middle of a Beat string, a grab, even while recovering from a knockdown, and have your desired Charge attack come out right as your previous move ends.
A very useful example of this is BBB-C3 (where you hold the CHARGE button before inputting BBB, and release it afterwards), which lets you hit enemies with a guaranteed C3 without them being able to dodge it. Another is B+J-C4, which lets you follow up a homing attack with a guaranteed C4.

However, there are limits: you cannot hold a charge forever. Once your charge gauge is at maximum, a counter will appear next to it and quickly tick down to zero in less than two seconds. Once it hits zero, your charge gauge resets back to zero as well.
You also cannot charge while running or being knocked down. Beginning a run while you were charging will reset the Charge gauge back to zero.
4.5. Multi-button attacks
Each character can do extra moves by pressing multiple buttons at the same time. Many of these are useful to know.
Sweeps (press BEAT+CHARGE, press BEAT again afterwards for a special follow-up):
Sweeps have a lot of horizontal range and knock down any enemies on hit, and are therefore one of your go-to attacks to hit enemies that are horizontally lined up. They also hit very low, which makes them useful when dealing with enemies standing below you.
Pressing BEAT right after a sweep lets you do a special follow-up attack that moves you forward. This makes sweep follow-ups useful as a poke (i.e. hitting an enemy outside its usual attack range), as they have good forwards range and enemies will never try to dodge them.
Most boss enemies will not get knocked down by sweeps or sweep follow-ups, and are instead put in a special blockstun state on hit that will have them recover faster than you. However, this makes sweeps useful for finishing off bosses.
Homing attacks (press BEAT+JUMP):
This is your go-to “gap closer” attack, similarly to how you would use the Stinger in Devil May Cry or Flying Swallow in Ninja Gaiden. It’s a leaping jump-slam attack that will try to home in on the closest enemy you’re facing or the one you’re locked on to. As it knocks down enemies on hit and has light super armor, it makes for a good approach tool.
Keep in mind that homing attacks easily whiff against enemies that are moving or running. This is because the arc of a homing attack is calculated at the start of a move and won’t change afterwards–an enemy still being on the move during your homing attack therefore means it’s highly likely to whiff.
Jump attack (tap CHARGE+JUMP):
What this does varies highly per character. In general they only have niche use cases and are not something you rely on.
For Spike, it’s a jumping knee that’s mostly useful as a poke and a wall combo starter. For White, it’s a somersault attack with rather questionable usefulness. For Tenshin, it’s a jumping sweep attack that also has a second follow-up, and is also what is used as his running jumpkick. Linda has no special jump attack, and will do rising split-kicks on this input instead.
Rising split-kicks (hold CHARGE+JUMP):
A rising split-kick attack that launches an enemy. Has forwards momentum if executed from a run. Pressing CHARGE again mid-air activates the second split-kick, which will knock away an airborne enemy.
This attack is primarily used in combos and for “picking up” juggled enemies that are too far away to be picked up by your other moves.
Running jumpkick (while running, press CHARGE+JUMP):
A running jumpkick that can kick holes into enemy groups. Sends hit enemies flying into other enemies, although not with the same range or power as a C4.
Useful at the start of a fight, but not as much once enemies are already nearby. You need a lot of distance to execute a running jumpkick, as it takes relatively long to both build up a run and for the kick to come out after you execute the input. Enemies can easily punish the startup of this move if you do it too close.
Linda does not have a running jumpkick, while Tenshin does a jumping sweep attack using this input.
Run attack (while running, press BEAT+CHARGE):
What this does varies per character. For Spike and Tenshin it’s a haymaker that’s slightly useful as a hit ’n run attack. For Linda it’s a useful slide attack that goes under most attacks and lets you follow up with a combo. For White it’s a shoulder bash that’s incredibly useful, as it’s like a running jumpkick except it comes out much faster and has more horizontal range.
Backsweep (while shifting, tap the opposite direction your character is currently facing + CHARGE):
A backsweep that actually has the widest circular coverage out of all your regular moves. However, it doesn’t do much damage and hit enemies are put in a hard knockdown, meaning that you cannot juggle them afterwards. A bit tricky to execute, but can be useful for when you’re surrounded from behind and don’t want to use a special attack.
4.6. Special attacks
Special attacks (performed using BEAT+CHARGE+JUMP) are your escape move or “get out of jail” card. Depending on the character, it’s usually an invincible spin attack that should be used when you’re surrounded and about to eat a lot of damage. You can even perform a special attack while you’re being grabbed or being hit by an enemy, but you can’t do it while being launched, knocked down, or thrown.
They work similarly like in most beat ’em ups, where they knock down all enemies around you and make you briefly invincible. Unlike in most beat ’em ups, where doing a special attack usually drains a bit of your health, in SpikeOut your special attacks are limited by your Special Items.
Special Items are limited: you start with three and you can only carry up to five. They are only refilled by item drops from specific enemies, and you automatically regain one Special Item after clearing an area with a boss fight. You shouldn’t carelessly spam Special Items, but since you can only carry up to five and refills are guaranteed, it doesn’t hurt to use Special Attacks aggressively when you’re already topped up on Special Items and you know a refill is coming up.
A better way of using Special Attacks aggressively through Special Throws (performed using BEAT+CHARGE+JUMP while grabbing an enemy from the front specifically–it won’t work from the rear or side). This will have you spin the grabbed enemy for several seconds while invincible, hit all surrounding enemies several times, and then leave the grabbed enemy vulnerable, which you can then follow up with a juggle combo. It’s great for damaging crowds or doing a lot of damage to a boss enemy.
In Digital Battle Online, doing Special Throws is generally not worth it. There they last shorter, hit less often, have a smaller effective range, and merely knock away enemies instead of catching them in your vortex to hit them multiple times. Special Throws were significantly buffed in Final Edition to be actually useful.
4.7. Weapons
You can use weapons in SpikeOut… but they’re generally not useful. Their attacks are slow and easily punishable, you cannot loop enemies with them, and you cannot get any good combos or damage off of them either. While you can outrange and cheese enemies with certain weapons, K.O.‘ing enemies this way is slow, and the timer is strict. Unless you know that you have the time, you’re better off sticking with your fists and legs.
To pick up a weapon, stand near a weapon or equippable object and press DOWN+BEAT+CHARGE. Press BEAT or tap CHARGE to attack using an equipped weapon. For single-handed weapons, you still have access to your grabs, throws, jumping/running attacks, and C2s/C3s/C4s. This isn’t the case for two-handed objects, however, and you’re less maneuverable while holding one.
Weapons in SpikeOut operate on Final Fight rules: you can use a weapon for as long as you want, but if you throw it away or its knocked out of your hands by an enemy, the weapons will start to despawn once they hit the ground. Weapons cannot be carried over to the next area, and will get automatically dropped when you’re moving to a new area.
Weapons don’t despawn immediately. If you’re quick enough, you can pick a weapon back up after throwing it/being made to drop it before it despawns.
Funnily enough, the most useful application of weapons is to throw them at enemies (press BEAT+CHARGE while holding a weapon to throw your weapon, preferably while locked onto an enemy with SHIFT so you actually throw your weapon at an enemy instead of blindly forwards). Most enemies will just get knocked down by thrown weapons, but thrown wrenches and knives are particularly useful because they dizzy enemies on hit, as if you C3’d them.
4.8. Universal combos
These combos work using most player characters.
For combo notation, inputs that have to be done while or after holding a charge are encased using [] brackets, with the number at the end noting the expected charge level. Underscore (_) signs represent slight pauses of about half a second, with longer underscores signifying a larger pause. Inputs combined with plus (+) signs should be pressed at the same time.
So for C[_BBB]3, first hold the charge button, then after half a second input BBB, and release the charge button right after BBB to execute what should be a C3.
Basic Beat string: BBBBBB
Launches enemy on the last hit. How the enemy is launched varies per character.
Alternate Beat string: BBBCCC
Deals a bit more damage than a basic Beat string, but doesn’t launch the enemy on the final hit as strongly.
Beat loops:
BB -> BB -> BB -> BB -> etc…
BBB -> BBB -> BBB -> BBB -> etc…
BBBCC -> BBBCC -> BBBCC -> BBBCC -> etc…
(Linda) CC -> CC -> CC -> CC -> etc…
(Linda) CCCCCCCCCCCC… -> etc…
Used for stunlocking standing regular enemies. Beat loops can be done using any combination of BB’s, BBB’s, or BBBCC’s. However, Linda can do CC’s, CCC’s and BBBCC’s. Linda also can just mash C repeatedly do a Beat loop.
Guaranteed C3: C[_BBB]3
A BBB with a quick C3 at the end. Enemies that can dodge a raw C3 won’t be able to dodge the C3 if you use this string.
Guaranteed C4: C[_ _B+J]4
Knocks down an enemy with a homing attack to land a guaranteed C4 afterwards. Useful against enemies that can dodge charge attacks, as enemies can’t dodge homing attacks.
For this combo to work, you must hit an enemy with the homing attack from either the front or the rear for the C4 to be able to connect. If you knock down an enemy with a homing attack from the side, the C4 will miss.
Semi-guaranteed C4: C[_ _BBB]4
A BBB with a C4 tacked on at the end. This does not have the same success rate as a B+J-C4, as there’s still a chance that after the BBB enemies can still dodge your C4. However, the chance for an enemy to dodge the C4 after being hit by a BBB is smaller. This string is still worth doing because it’s faster and safer than a B+J-C4, as it’s less likely to be interrupted.
5. Enemies and you
5.1. General enemy behavior
Although SpikeOut has many unique enemy types, the grand majority of them behave largely the same. As long as you understand a few rules, you should have an idea of how to deal with most of them.
5.1.1. How to not get hit
The most important thing to know is knowing how to deal with enemy attacks. Unlike most melee action games, most attacks in SpikeOut are too fast to be reacted to–you instead deal with them by anticipating them.
The rule of thumb is that you can expect to be attacked by an enemy if they’re standing too close to you for too long. And if you’re attacking another enemy (or if you are just punching the air), nearby enemies will move in and attack you more aggressively.
Attacks can be pre-emptively mitigated by hitting them before they hit you, using moves with invincibility such as throws and specials to power through them, or by simply sidestepping the enemy. While enemy attacks come out quickly, they don’t do so instantly. This means you can strafe circles around most regular enemies and basically never get hit, and then punish them as they miss their attacks.
Regardless, walking or shifting towards an enemy in a straight line is a good way to get yourself hit, especially if said enemy is carrying a weapon with large range. For a safe and consistent approach, consider instead:
- strafing around them in a circle, and then punishing them after they inevitably miss their attack.
- hitting them with a poke attack that has a lot of forward range, such as your running attacks, homing attacks, or sweep follow-ups.
- not shifting or walking, but running up to an enemy and immediately canceling the run by hitting the enemy with Beat attacks. This works surprisingly well against enemies with a low reaction speed.
- knocking them down first using other attacks (such as throws, sweeps, or C4s), and then hitting them right as they wake up.
Of course, each method has its own drawbacks. Enemies will rarely be isolated or alone and the situation will always be fluid, so decide accordingly.
5.1.2. How to deal with enemy grabs
Most enemies can also randomly decide to go in for a grab whenever they feel like it. Unlike regular punches and kicks, grab attempts will track you perfectly and can’t be sidestepped or circlestrafed around. You can tell an enemy is going in for a grab if it looks like they’re shifting towards you (moving towards you at a constant speed with their arms down).
If an enemy has grabbed you, you can escape their grab by repeatedly wiggling the stick left and right. You can also instantly escape a grab by doing a Special Attack, but this costs a Special Item.
Some enemies can dizzy you using certain shockwave attacks (such as sumo claps or an enemy smacking the floor with a hammer). Escaping a dizzy works the same way as escaping a grab.
Once an enemy has begun to throw you, you can no longer escape it, and are forced to sit through the attack animation. In co-op, a partner can interrupt the throw by hitting the enemy throwing you, and so save you from taking more damage. In solo play, you’ll usually have to eat the entire throw.
Instead of letting yourself get grabbed, you also can simply hit an enemy going in for a grab, as they’re wide open when doing so and won’t retaliate.
5.1.3. How knockdowns work
A lot of your moves can knock down or launch an enemy, leaving them disabled until they get back up. Because you will always be outnumbered, knocking down enemies is essential to avoid having to deal with every enemy at once.

One thing to keep in mind is that after an enemy has been knocked down on the floor for over a second, they can’t be hit by your standard moves anymore (not even low moves like sweeps). As they’re getting back up, they’ll be completely invincible too.
That said, enemies waking up are completely defenseless to you hitting them right as they finished waking up and their invincibility ends–what would be called in fighting games a “meaty” hit. The timing for landing a meaty hit on an enemy waking up isn’t exactly intuitive, but knowing it is important for being able to land safe, guaranteed hits on an enemy.
Unlike in other beat ’em ups, all enemies in SpikeOut have the same wake-up speed. Knock down a group of enemies with a backsweep and they will all get back up at about the same time. Generally it’s not in your favor to have all enemies wake up at the same time, which is why you should “manipulate” enemy wake-up times by juggling one of the knocked down enemies so they’ll wake up later.
5.1.4. How to deal with chasing enemies
You might be wondering why you can’t just run away from enemies forever while doing hit ’n run attacks, and the reason for that is because almost every single enemy in the game will chase you down with a homing jumpkick if you try to move away from them. On harder difficulties, just shifting backwards for over a second is enough for enemies to spontaneously bust out a homing jumpkick.
There are ways to deal with these, of course. The first one is that you can hit an enemy out of chasing you by hitting them with moves that high like C2s or rising split-kicks. Low moves like sweeps are more likely to go under the enemy chase kick and cause both of you to miss.
Second one is to sidestep a chase kick at the right time. While enemy chase kicks track you too strongly to be avoidable by strafing in a single continuous direction, you can however dodge them by sidestepping the kick at the last moment. This also lets you punish the enemy after it missed its kick. Keep in mind that sidestepping chase kicks becomes much harder when multiple enemies are chasing you down at the same time.
You can also prevent chase kicks by standing still or moving towards enemies that are chasing you. Not only will this make them end their run, but enemies that are recovering from a run are completely open to any attacks.
Similarly, while retreating, you can prevent being surprised by point-blank chase kicks if you shift backwards using staggered steps instead of moving backwards continuously. Basically, you tap backwards repeatedly instead of holding back. It moves you slower, but it prevents any chase kicks from happening.
5.1.5. How to deal with enemy dodging
At first it seems like you can get away with spamming C4s a lot, but after the first areas, you’ll notice that not only bosses but regular enemies too will start dodging your charge attacks by backing away on reaction. Not just your C4s, but your C3s and C2s too.
Each enemy type has a set chance to dodge your charge attacks when they’re in a neutral state. This does mean that if they are doing something else, such as attacking or waking up or being dizzied, they won’t be able to dodge your attacks.
In Final Edition, enemies can also back away when you’re about to perform a jump throw.
A way to get around enemy dodging is to first stun them using another attack that they will never dodge (i.e. anything that isn’t a charge attack). The BBB-C3 string is useful as a guaranteed way to land a C3, as the BBB prevents the enemy from escaping your C3 in time. You can also land guaranteed C4s by performing one right after hitting an enemy with a homing attack (B+J). Meaty charge attacks also prevent enemies from being able to dodge you.
Keep also in mind that enemies merely move backwards when dodging you. If their back is already up against a wall, or if their retreat is bodyblocked by another enemy that stands firm, then your charge attacks are still guaranteed to land, so keep an eye out for these opportunities.
5.2. How to deal with bosses
Boss enemies are going to be your largest roadblocks when playing SpikeOut, as they play by their own set of rules, always come with a group of minions to support them, and you’ll face at least over 15 boss fights in any run.
5.2.1. Boss resistances
What sets them apart is not only their large healthbars, but their many resistances. For example, bosses can’t be knocked or launched by a lot of your moves. They will just tank sweeps or running attacks. It’d be easier to list what can knock down a boss:
- Being thrown.
- Jump throwing another enemy at them (only jump thrown enemies can knock them down, forward/side/back thrown enemies will not!).
- C2s, C4s, or C4ing another enemy at them.
- Special attacks and being hit by the spins of a special throw.
- Being hit mid-air by anything (their knockdown resistance doesn’t apply if they’re airborne).
A few bosses, in particularly trio bosses like DEWEY/LOUIE/HUEY and BLAKE/CLAY/MUIR do not have knockdown resistance and can be swept off their feet like normal.
To make matters more difficult, Beat loops do not reliably work against bosses. Each boss has a chance to escape hitstun each time you hit them with an attack, where they will flash yellow and immediately perform an invincible counterattack. You can keep them looped if you’re lucky, but eventually they will escape.
All bosses can also escape from your grabs if you keep them grabbed for too long without doing anything, which usually takes over a second.
Looping bosses by hitting them with meaties on their wake-up also works differently. In DBO, each boss has a set response that they will always do after waking up (counterattack immediately, or shift backwards for a few seconds while invincible) that you can consistently exploit. In Final Edition, what bosses will do on wake-up is completely random, which makes any meaty attempts inconsistent. You have to pay attention to what a boss will do and respond accordingly.
Some bosses also have one or more special resistances, such as:
- Immunity to being dizzied by your C3s (however, certain thrown weapons still dizzy them).
- Having perfect chase kick tracking, making it impossible to sidestep their chase kicks.
- Having stronger tracking on their regular and flashing attacks, making it harder to stidestep them.
- Being a heavyweight, which will make doing certain types of throws on them fail and have you take a bit of damage.
- In Final Edition, some bosses can randomly negate the landing damage of a jump throw.
- In Final Edition, some bosses can randomly do an invincible mid-air recovery after being hit in the air, and can thus escape your juggle combos.
5.2.2. Flashing attacks
Perhaps the most noteworthy thing about bosses are their “flashing attacks”. These are powerful attacks telegraphed by the boss flashing red and yellow, and each boss has them.
In Digital Battle Online, bosses that are flashing have super armor. This means that they won’t be interrupted by your regular attacks, although they’ll still take full damage. This makes attacking bosses in a neutral state dangerous, as they can tank through your blow and hit you regardless.
However, certain attacks such as charge attacks, special attacks, and jump thrown enemies can still interrupt a flashing boss. Only some flashing attacks for some bosses are completely invincible, although these are telegraphed the same way as super armored flashing attacks are.
But in Final Edition, flashing attacks have been changed so all flashing attacks for all bosses now makes them completely invincible. This means it’s impossible to interrupt any boss doing a flashing attack, let alone do any damage to them.
In addition, Final Edition also gave some bosses new flashing follow-up attacks that they can randomly do right after a flashing attack if you were close enough.
5.2.3. How to deal with bosses
Knowing all this, to safely and consistently deal with bosses you have to take a more reactive approach, or rely on launching other enemies at them using throws and C4s.
As a rule of thumb, you want to bait a boss into attacking by hanging around their attack range, sidestep it, and then punish them with a C3 once their invincibility ends. In DBO, you can afford to attack most bosses with a C3 while they’re still flashing. Knowing good wall combos for your character will be helpful for doing the most damage possible against a boss for each C3 you land.
Each boss will always come with a group of minions to support them. If possible, you want to isolate the boss(es) from their minions so you can focus on the boss. If it isn’t possible, you can focus on the minions first so you can deal with the boss(es) alone afterwards. Boss minions do not respawn infinitely, unlike in some other beat ’em ups. If the situation is too crowded, you can bowl the crowd over using C4s/throws, or bait enemies into chasing you by running away.
For each boss fight, there is always a minion that will drop a large health item on K.O. and another minion that will drop a special item on K.O. You can memorize their names so you know which ones you have to target if you need their items.
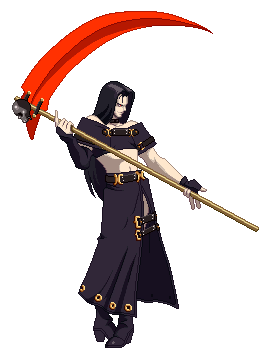
6. Player characters
6.1. Spike
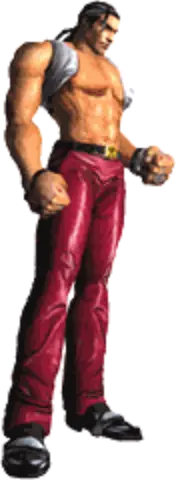
Spike Jr. not pictured
*A former New York boxer. Height, 185cm/6'0.8"; Age, 27.
He is not good with interpersonal relationships, typically being silent and expressionless if he’s not in a fight. His intimidating presence makes people fear him, except for White who works in the same factory as him. Spike always carries his 5-year-old son on his back.*
6.1.1. Gameplay overview
A heavy-hitter whose gameplan revolves around his uniquely high-damage C4, allowing him to clear out enemies with up to medium health faster than others. He boasts having the most damaging special throw combo out of all characters, making him the go-to boss-killer out of all characters.
Despite his high damage and decent crowd control capabilities, his attack range is downright terrible; when up close his jabs will whiff against shorter characters, and even simply trying to jab regular-sized enemies from behind will make your jabs whiff. While devastating in the right hands, you need to be adept in positioning and charging to seize the opportunity for landing an effective C4.
Spike always carries his son, Spike Jr., on his back, who will follow you around on foot and shadow your moves if he gets knocked off. Spike Jr. being there does not influence the gameplay at all and is entirely cosmetic, but it does look pretty amusing.
Power: ⭐⭐⭐⭐⭐
Range: ⭐★★★★
Crowd control: ⭐⭐⭐★★
Ease of use: ⭐⭐★★★
Pros:
- His C4 attacks uniquely deal a maximum of 150 HP damage compared to the maximum possible 100 HP damage of other characters, allowing Spike to more quickly clear out low-to-medium health enemies in one or two blows.
- His stronger C4 attacks also make his Special Throw combos one of the most damaging combos in the entire game, allowing you to remove 25-50% of a boss’ total HP in one go. This has been buffed to a further ridiculous degree in Battle Street.
- Can do strike grabs.
- Well-rounded throw game.
- Simple but damaging combos.
Cons:
- Poor forwards reach on his Beat and C4 attacks. Has to rely more on punishing whiffed enemy attacks or making risky commitments using homing attacks to close the distance.
- Horrible downwards reach means his Beat attacks will whiff constantly against shorter enemies or enemies standing on a lower elevation. Going for strike grabs is particularly inconsistent in such situations.
- Once you get to the part of the game where enemies will regularly start dodging your charge attacks, you need to really up your crowd control game.
6.1.2. Spike combos
Open field combo:
BBBCCC -> immediately while running forwards, hold C+J -> C
You can use this combo to juggle an enemy with rising split-kicks after a BBBCCC, but the timing is strict.
Basic wall combo:
C4 into wall -> C2 -> C2 -> C2 -> C2
Great against regular enemies and bosses. Make sure to keep a bit of space between yourself and the enemy when doing C2s instead of doing them point blank, otherwise the juggled enemy will slip away from the wall.
Advanced wall combo:
C4 into wall -> C2 -> C2 -> hold C+J -> delayed C -> C2 -> hold C+J -> delayed C -> C2
Same as a basic wall combo, but with rising splitkicks inbetween the C2s.
Basic Special Throw wall combo:
Frontal grab (-> BB) -> Special Throw into wall (begin charging halfway during throw) -> C4 -> C2 -> C2 -> C2
Pummels are optional. The C4 should come out right after the Special Throw.
Advanced Special Throw wall combo:
Frontal grab (-> BB) -> Special Throw into wall (begin charging halfway during throw) -> C4 -> C2 -> hold C+J -> delayed C -> C2 -> hold C+J -> delayed C -> C2
Same as the usual Special Throw combo, but with more damage.
Anti-mid-air recovery combo:
C4 into corner -> BBBCCC -> C2
You want to use this combo where possible against bosses that can do mid-air recoveries, as it has only a low chance to trigger a mid-air recovery. Should be used in the corner for max. consistency.
6.2. White
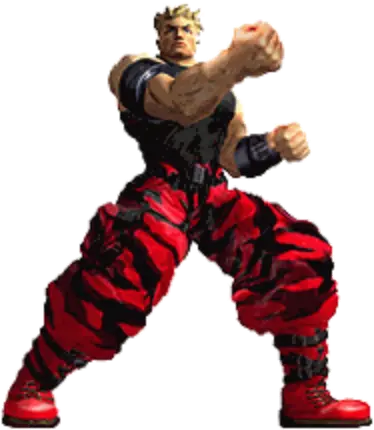
*A military man born in New York. Height, 185cm/6'0.8"; Age, 25.
He has an optimistic and mischievous personality, always talking in a loud voice. The first person to beat him in a fight was Spike, and White has been keeping tabs on Spike ever since.*
6.2.1. Gameplay overview
Power: ⭐⭐★★★
Range: ⭐⭐★★★
Crowd control: ⭐⭐⭐⭐★
Ease of use: ⭐⭐⭐⭐★
White is a specialist in crowd control thanks to his amazing shoulder bash, which is by far the best running attack in the entire game. It has amazing properties, is excellent at closing the distance or setting up combos, and can keep entire groups knocked down. In other situations he can fall back to his strike grabs to regain the initiative.
Despite this, he also has some of the lowest damage. Although he can easily deal with crowds, he has trouble with finishing off enemies–bosses in particular, who are resistant to his shoulder bashes. In a strange turn of fortune, White somewhat compensates for this by being the only character who can do a true infinite, capable of looping bosses to death in a single combo–although a it’s bit of an exploit.
Your mileage may vary on how legit using this is for survival–other enemies surrounding you can still hit you out of it like with any Beat loop–but White can easily break the scoring system by scoring 99-HIT combos on enemies and hitting a counterstop (the maximum possible score value the game can display on the HUD) very early on. If anything, this has created its own score category for who can hit the counterstop the earliest using White.
Pros:
- Shoulder bash is the best running attack and crowd control move in the entire game, on top of being a great approach tool. Unlike running kicks, it comes out immediately, has a wide range, and can easily knock over half of an entire group.
- Can do strike grabs.
- Okay-ish throw game.
- Is the only character with a true infinite.
- Has the most amusing emotes in the game.
Cons:
- Slightly better vertical reach than Spike, but still has poor forwards reach.
- Lowest damage output in the entire game makes him struggle to actually finish off enemies, and gives him a tougher time against boss enemies.
- Has an unique special attack that’s also the worst in the game; it makes him randomly punch around himself six times, but this gives it rather poor coverage and makes hitting one enemy multiple times rather inconsistent.
- Also the worst special throw in the game, as you have only limited options to follow it up with.
6.2.2. Combos
Beat combo:
BBBBBB -> BBBB -> BBB -> C4
Fast sweep combo:
C[B+C -> B followup]4
Sweep combo:
B+C ->C[B followup -> BBB]4
Advanced sweep combo:
B+C -> C[B followup]3 -> C[BB -> BBB]4
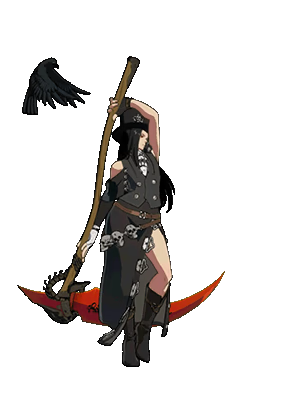
6.3. Linda
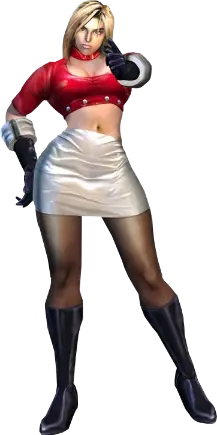
The intelligent daughter of a successful family, she had plans to become a judge in the future. While she is generally calm, she has a strong moral compass and will take action if she believes someone to be in the wrong. She serves as the mediator between White and Tenshin.
6.3.1. Gameplay overview
Power: ⭐⭐⭐★★
Range: ⭐⭐⭐⭐★
Crowd control: ⭐⭐★★★
Ease of use: ⭐⭐⭐⭐★
A flexible kick-based fighter, Linda is a bit of an all-rounder with no major weaknesses or strengths, which makes her great for beginners. Linda’s long range and forward movement on her attacks makes it easier to land attacks than with other characters, but this has the double effect of also making it easier for enemies to punish her if she whiffs an attack.
She also uniquely has multiple BBBBBB enders. Holding forwards after the first three hits will make her perform a Beat finisher that launches the enemy upwards, similarly to White’s Beat finisher, whereas not holding a movement direction will make her perform a kick with decent horizontal range.
Pros:
- Long reach and forwards movement on her Beat attacks make it easier to land attacks on enemies.
- Best forward throw in the game.
- Has the easiest Beat loops in the game. Simply mash C to stunlock enemies.
- Can do juggle combos off grabs using her pummel finisher.
- Sweep follow-up launches enemies forwards like a mini-C4.
- Lack of a jump move/running kick means her rising split-kicks come out on-press instead of on-hold, meaning it comes out faster than with other characters.
- Hitting the special throw follow-up does not require a wall.
Cons:
- Forwards movement on her attacks is a double-edged sword, as it makes it easier for enemies to punish her when she whiffs.
- Her homing attack has the worst reach out of all characters.
- Has no running kick or special C+J move.
- Her sweep and its follow-up have rather poor range.
- Side throw has horrible range.
- Her special throw dealing damage to the grabbed enemy over time means it can end prematurely if the HP of the grabbed enemy hits zero before the final spin.
- Weak combo potential.
- Strike grabs being done using C means she cannot do a CC strike grab out of a run, forcing her to rely on a slower BBBCC strike grab.
6.3.2. Combos
Anti-boss combo:
Frontal grab BBB-> C[B+J]4
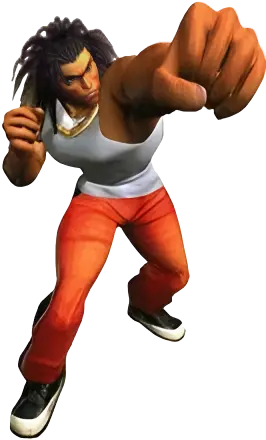
6.4. Tenshin
A 23-year-old Japanese man, he towers over the other 3 characters at 193cm/6'4". He is a well-read, intelligent person who always speaks calmly. Because he chooses his words carefully to not be wasteful, he is the antithesis to White. Tenshin rarely gets angry, but can be the scariest if provoked.
6.4.1. Gameplay overview
Power: ⭐⭐⭐⭐★
Range: ⭐⭐⭐⭐★
Crowd control: ⭐⭐⭐⭐★
Ease of use: ⭐⭐⭐★★
Tenshin plays a bit more radically from the rest: his gameplan revolves more around controlling crowds using attacks with large horizontal coverage, rather than relying on throw invincibility. He cannot do true strike grabs, and is more reliant on his strong C3s and whiff punishing to initiate a proper offense.
Pros:
- Best side throw in the game.
- Best combo potential in the game.
- Best C3 in the game, with great horizontal range capable of hitting and dizzying multiple enemies at once.
- Sweep follow-up sends hit enemies flying diagonally and can easily scatter groups.
- Can do juggle combo off grabs using his back “throw”.
- Hitting the special throw follow-up does not require a wall.
Cons:
- Cannot do true strike grabs.
- Forward throw from a frontal grab has exceptionally poor range (however, back throw from a frontal grab has better range).
6.4.2. Combos
Grab-into-wall combo:
(Frontal grab (BB) -> C ->) back throw -> C2 -> C2 -> C2 -> BBB -> C2
Works great against bosses.
Anti-boss mid-air recovery combo:
(Frontal grab (BB) -> C ->) back throw into wall -> C[B -> B -> BBB]4
Works great against bosses with mid-air recovery.
7. Extra
7.1. Beginner goals
Starting out learning SpikeOut by trying to do full runs with limited or no continues will drive you insane, because this game is excruciatingly long by arcade standards and filled with all kinds of difficulty spikes. A more efficient way of learning the game is to try clearing individual stages first using no or limited continues. Inevitably you’ll keep dying more than usual in certain areas or boss fights, and those are the sections that you want to practice in particular using savestates until you can beat them consistently (try beating them five times in a row without dying!). Then you try doing full runs of the stage again until you get stuck on another fight, and repeat the process until you manage to consistently beat the stage without dying (too often). Then you can continue doing the same thing for the other stages and, once you can beat each indivvidual stage on your route consistently enough, try going for full game runs.
Here are some nasty difficulty spikes and milestones you can set for yourself, if you’re following the beginner stage route. These aren’t hard guidelines, just treat them as suggestions and set your own goals where you feel they’re necessary:
Beat the DOUGLAS/NORAH fight in the first area of DIESEL TOWN five times in a row without dying once. This will be your first major roadblock.
Beat the HUEY/DEWEY/LOUIE fight in the DIESEL TOWN - FACTORY area five times in a row without dying once. This will be another one of your major roadblocks.
Beat the STORE ENTRANCE area (WANG boss fight and the enemy waves leading up to it) five times in a row without dying. Another roadblock, because this is where enemies will be dodging your attacks all the time.
Beat the final ASTRO MALL boss fight (RYUJI) five times in a row without dying.
Beat the first IMPERIAL OPERA area (LABRYNTH) five times in a row without dying.
Beat the first three opera interior areas in IMPERIAL OPERA (OPERA LOBBY 1F -> OPERA LOBBY BF -> AUDITORIUM) five times in a row without dying, excluding the AUDITORIUM Opera Trio boss fight.
Beat the Opera Trio boss fight five times in a row without dying.
Beat the final boss five times in a row without dying.
Do a full game run without dying and get the 1CC (one-credit clear)!
7.2. Tips and tricks
- Some enemies are heavyweight, and throwing them will make your throw fail and make you take a bit of damage. However, jump throws, pummel finishers and special throws will always work on them.
- Enemy pathfinding is primitive and they won’t move around things in their path. You can exploit this to make them get stuck on level geometry.
- Moving backwards alongside a wall has enemies clump together in a way that perfectly lines them up for a C4.
- The camera will try to stay in place when you’re shifting, and you can wrangle the camera to point towards where you’re moving if you’re running.
- If enemies are too clumped up, first split them up using running kicks and C4s, or by baiting them into chasing you.
- It’ll be easier on you to finish off enemies one-by-one instead of trying to damage
- Be mindful of environmental waste and recycle your enemies! Instead of finishing them off regularly, finish them off by throwing or launching them into another enemy. That way you get the K.O. and knocked down enemies.
- Remember, you can immediately cancel a run by pressing SHIFT or doing BEAT attacks.
- You cannot fall off or jump over the walls of the stage, and neither can you knock enemies off the stage (…unless their HP is already zero).
- You are invincible while getting up after being knocked down, and for a slight bit after you regain control. One of the best things you can actually do while waking up is to hit an enemy with a C3 while you’re still invincible.
- I have uploaded a 1CC run on Hardest using Spike, with full close captions commentary explaining the game and the strategies I use. It might be useful to watch:
8. Special thanks
- SEGA, for making this game
- The Supermodel team, without who this game wouldn’t have been playable on PC for the longest time
- Everyone at Bird Gang, Critpoints and The Scoreboard for the support
- Space Tacos, without who I probably would never had the contrarian impulse to dive into the SpikeOut rabbithole to begin with
- Dragon307, icuk7, carr9425, pengwenbao1168, yipchan2124, caucow, kenwong9865, ssstar1606, and sapporo3215, whose uploaded SpikeOut runs were instrumental to helping me figure out the deeper parts of the game
- LAZY DAISY/lazy_35P for writing up one of the first detailed SpikeOut guides I could find, and ArcadeStriker for translating it into English
- tacos for making one of the first English SpikeOut video guides
- All the other Spikers around the world!
9. Version history
- Version 1.0 - 20/05/2025
- Initial version
10. Coming in the future in Part 2
- Advanced tech
- Advanced strategies
- Level-specific strategies
- Secret item locations
- Other secrets
- Bugs / exploits
- Statistic tables